Scraping the Windows 98 Filesystem
In the process of writing my website, I wanted to be able to have a realistic filesystem on the site to really help the immersion—with a real FS, the site could seem more and more like a real system. This needed a list of every file available on the Windows 98 filesystem, and I would need to make that myself.
Running Windows 98 in a VM
To get a good copy of the filesystem, I first needed to install Windows properly. I don’t have an old enough computer handy, so I decided to virtualize it. To virtualize Windows 98 you typically need both a boot floppy (containing MS-DOS) and the Windows 98 installation CD, and some fiddling about with DOS to get it to boot. This is a hassle, but thankfully it turns out that the Windows 98 OEM CDs are directly bootable. ISOs of these CDs are available out on the internet and can be found with your search engine of choice.
I used QEMU for my virtualization, mostly because I could do it from the command line. To initialize the disk, I used:
$ qemu-img create -f qcow2 w98.qcow2 512M
to create a 512MB disk. From sources I read online, disk sizes of up to 2GB
work fine, and above that they need specific large file system support from
Windows. I decided to play it safe and just have a small disk, which is more
than enough for my purposes. Next, I mounted the installation disk win98.iso
and booted up the VM with 512MB of RAM:
$ qemu-system-x86_64 -cdrom "isos/win98.iso" -boot order=d -drive file=w98.qcow2 -m 512
After waiting around 25 minutes for installation, I shut down the VM and made a backup copy of the filesystem disk. Now, to start the VM I could just run:
$ qemu-system-x86_64 -drive file=w98.qcow2 -m 512
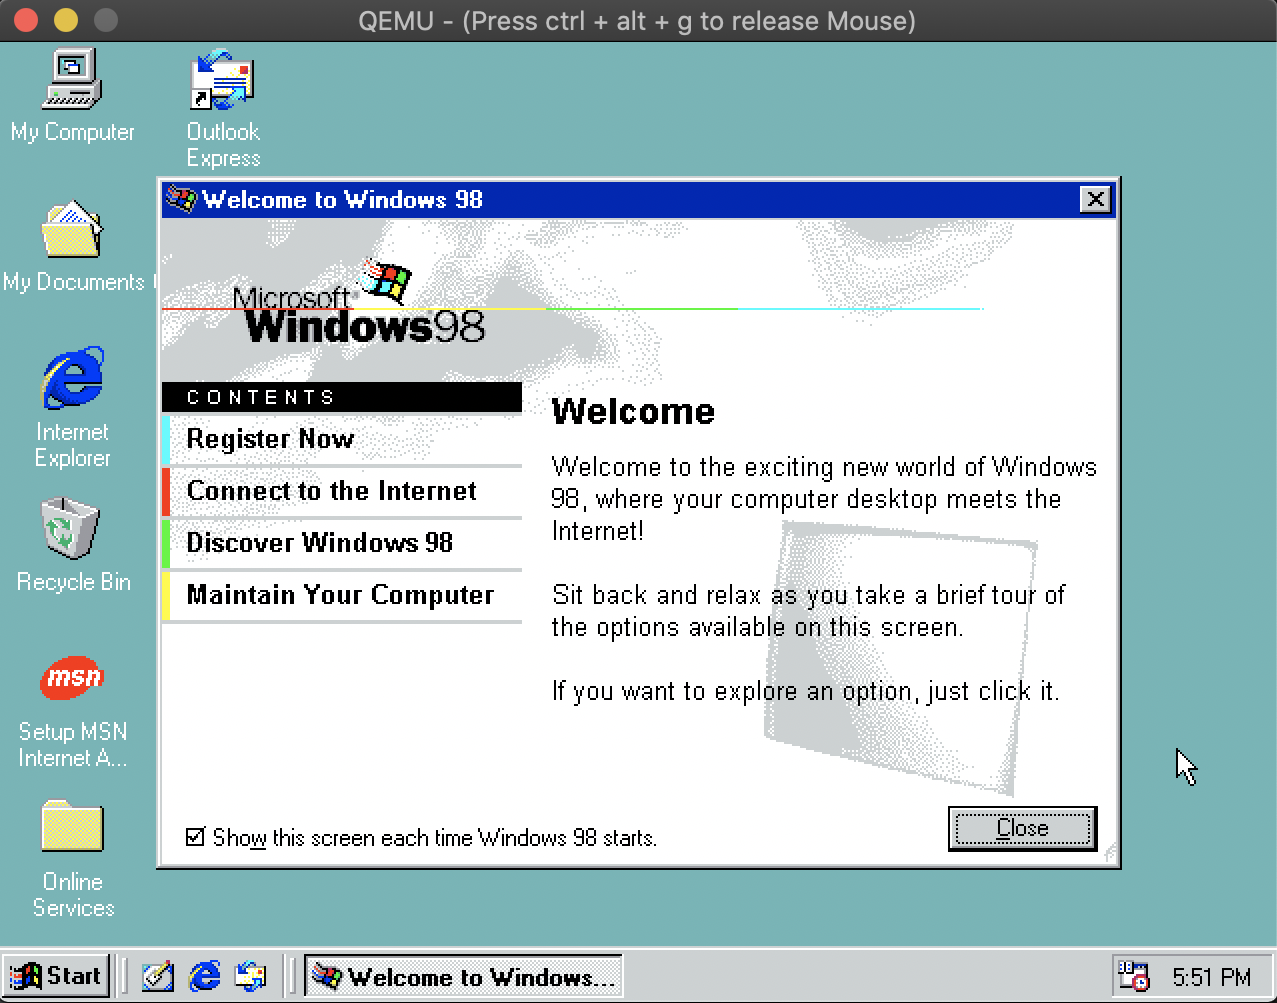
Sidebar: 32-bit true color
The default Windows 98 display driver only supports 16-bit color at 640x480, and for future projects I wanted to see if I could bump that up. Thankfully, there is an freeware driver that supports this. To do this, I needed to get files onto the VM, which would be tricky without networking. I ended up creating a virtual CDROM containing the driver using:
$ hdiutil makehybrid -iso -joliet -o colordriver.iso ./colordriver
$ qemu-system-x86_64 -cdrom colordriver.iso -drive file=w98.qcow2 -m 512
Once I booted the system, I needed to install the display driver. I followed
these instructions from
Microsoft.
Briefly, the process is to right click the desktop → Properties →
Settings → Advanced → Adapter → Change and then follow the
wizard. You’ll want to choose the display driver from a list, and then navigate
to the D:\ drive. I installed the 2014.02.14 version of the VBEMP driver,
and the 128 version of the driver. After a restart, the option of 32-bit true
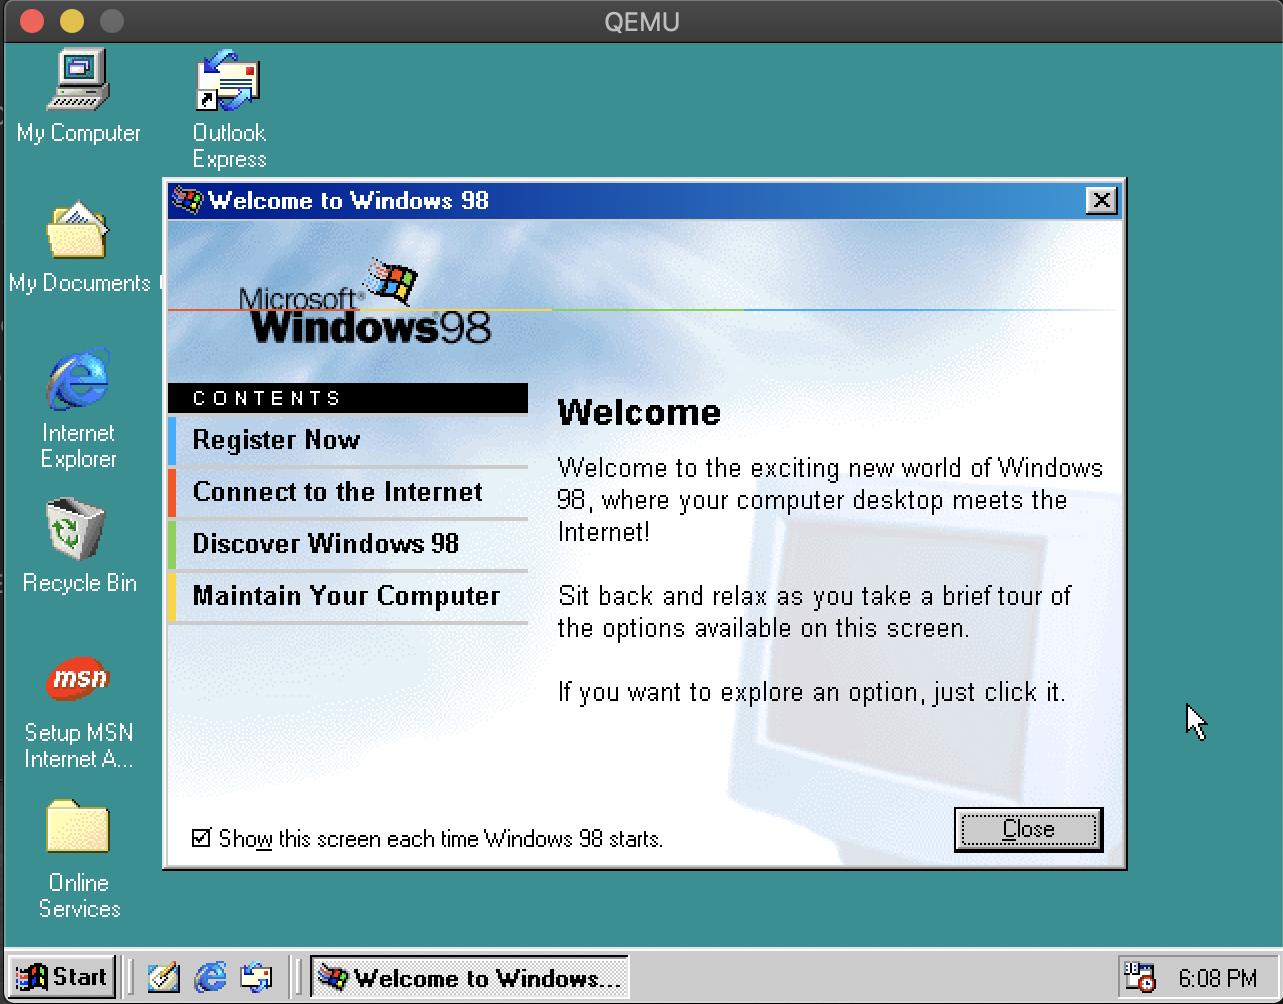
color was available in the display settings menu, and I selected that. After
yet another restart, the VM was using 32-bit color! The difference was
significant:
Scraping the Filesystem
The next step was to access the installed disk in order to create a listing of
every file on the disk. The easiest way to do this was to simply convert QEMU’s
.qcow2 disk format to an IMG, which is directly mountable in macOS. You can
do this with:
$ qemu-img convert -f qcow2 -O raw w98.qcow2 w98.img
which will create the w98.img file. You can double-click to mount it, and
then the files will be available under /Volumes/Untitled/. All you have to do
now is to run a quick Python script to generate a listing of the whole disk! I
used this:
#! /usr/bin/env python3

import os
import json
import sys

def folder(base):
    listing = {}
    for f in os.listdir(base):
        full_path = os.path.join(base, f)
        if os.path.isdir(full_path):
            listing[f] = folder(full_path)
        else:
            listing[f] = None
    return listing

print(json.dumps(folder(sys.argv[1])))
This creates a not-very-compact but usable representation of the filesystem in JSON (56kb). With some tweaking, you could conceivable get this down much lower, e.g. with some bit-packing based approach. In my case however, all I needed to do was just load this into the filesystem driver on the website, and it’s good to go!